Evg.Filter
Build image processing pipelines by composing filter operations.
A filter is an image effect applied to a shape after it has been drawn, much like stacking adjustment layers in a photo editor. A blur softens the edges, a drop shadow draws a dark blurred copy behind the shape, turbulence generates cloudy noise, and a displacement map warps a shape using another image as the guide.
import Evg
import Evg.Filter as Filter


-- A simple drop shadow:
shadow =
    Filter.merge
        [ Filter.sourceAlpha
            |> Filter.gaussianBlur 3
            |> Filter.offset 2 2
        , Filter.sourceGraphic
        ]
When run, this shows the original shape with a soft dark copy of itself peeking out behind and slightly below it.
The key idea: each filter takes one or two input images and produces an output
image that can be piped into the next filter using |>.
Basics
Modifying filter primitives
Restricts a filter operation to a rectangular part of the filter area.
Each filter operation normally covers the entire filter area. withinSubregion
confines the previous operation's input and output to a smaller rectangle.
This is useful for limiting expensive effects to where they are needed, or
creatively, for confining a blur or a color fill to just part of the image.
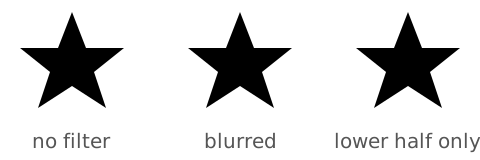
The coordinates are fractions of the filter area (which defaults to the
element's bounding box plus some padding). So { x = 0, y = 0, width = 1, height = 1 }
covers the full filter area, and { x = 0.25, y = 0.25, width = 0.5, height = 0.5 }
covers the center quarter.
-- Blur only the bottom half:
Filter.merge
    [ Filter.sourceGraphic
    , Filter.sourceGraphic
        |> Filter.gaussianBlur 5
        |> Filter.withinSubregion
            { x = 0
            , y = 0.5
            , width = 1
            , height = 0.5
            }
    ]
This renders the original shape with a blurred strip across its bottom half.
Anything a restricted operation produces outside its rectangle is clipped
away, so without the merge the top half would simply be empty.
Forces a filter operation to do its color math in the sRGB color space.
By default, SVG filters compute in a color space called linearRGB, which can produce unexpected results. For example, a Gaussian blur in linearRGB tends to darken colors and create muddy midtones. Using sRGB often gives results closer to what you would expect from photo editors or CSS filters.
-- A blur that preserves perceived brightness:
Filter.sourceGraphic
    |> Filter.gaussianBlur 4
    |> Filter.withinSRGB
This is especially noticeable for blurring, blending and compositing operations, where linearRGB math can produce visible color shifts.
Sources
These represent ways to get an input image into the filter pipeline:
A black silhouette of the shape the filter is applied to. It keeps the shape's outline and transparency (including soft anti-aliased edges) but replaces all its colors with black.
This is the usual starting point for drop shadows, since a shadow is a dark copy of the shape's outline. It is also handy as a mask for cutting other images down to the shape's silhouette.
The shape the filter is applied to, exactly as it would have been drawn with no filter, in full color. Use this when you want the original shape to appear somewhere in the final result, for example drawn on top of its own shadow.
Loads an external image (by URL) to use as a filter input, for example as a texture to blend over the shape. The image is stretched to fill the filter area.
Filter.image "texture.png"
    |> Filter.blend Filter.Screen
        Filter.sourceGraphic
The shape appears lightened by the bright parts of the texture image.
Like image, but with explicit control over how the image scales to fit
the filter area, so it can keep its proportions instead of stretching. Meet
fits the whole image inside the area (possibly leaving gaps), Slice fills
the area completely (possibly cropping), and the align value picks which part
of the image stays anchored.
import Evg.Advanced
    exposing
        ( AlignValue(..)
        , MeetOrSlice(..)
        )


Filter.imageAspectRatio XMidYMid Slice "photo.jpg"
Filter Primitives
Color fills
Fills the whole filter area with a single solid color. On its own it just
paints a colored rectangle over the shape; it becomes useful when combined
with other filters, for example recoloring a silhouette with compositeIn.

Filter.flood (Color.rgb255 255 0 0)This produces a solid red rectangle covering the filter area.
Like flood, but takes the color as a CSS color string.
Filter.floodStr "#FA32CA"This produces a solid pink rectangle covering the filter area.
Blurring
Softens the input image, smearing sharp edges into a gentle haze, like an out-of-focus photograph. Use it to de-emphasize background elements, soften edges, or as the blurry ingredient of a drop shadow or glow.
The number is the blur radius: larger values give a blurrier result.
Filter.sourceGraphic
    |> Filter.gaussianBlur 3
Like gaussianBlur, but with separate horizontal and vertical blur radii.
Blurring only horizontally gives a motion-streak look; only vertically gives a
smeared, dripping look.
Noise generation
Generates soft, organic, cloud-like noise, filling the filter area with
random smoky color. Use it as a texture (clouds, marble, water) or as the
guide image for displacementMap to make things look warped or hand-drawn.
Filter.fractalNoise
    { baseFrequency = 0.05
    , numOctaves = 3
    , seed = 1
    , stitchTiles = False
    }
This fills the area with a colorful, smoky cloud texture.
Note that the texture is generated from nothing: whatever shape you apply
this to is replaced by noise rather than textured. To affect a shape, feed
the noise into displacementMap.
The options:
baseFrequencycontrols how fine the noise is (smaller values give larger features)numOctavesadds layers of detail (more layers give a more intricate pattern)seedpicks a different random pattern for each valuestitchTiles, whenTrue, makes the noise pattern tile seamlessly at the edges
Generates swirling, marble-like noise that fills the filter area. Compared
to fractalNoise it looks sharper and more vein-like, resembling flames,
marble or rippling water rather than soft clouds. Use it as a texture or as
the guide image for displacementMap. The options mean the same as in
fractalNoise.
Filter.turbulence
    { baseFrequency = 0.05
    , numOctaves = 2
    , seed = 1
    , stitchTiles = False
    }
This fills the area with a sharp, swirling colored texture.
Note that the texture is generated from nothing: whatever shape you apply
this to is replaced by noise rather than textured. To affect a shape, feed
the noise into displacementMap, which uses it to push
the shape's pixels around.
Displacement
Warps the first input using the second input as a guide image. Each pixel
of the first image is nudged sideways and up or down by an amount read from
the corresponding pixel of the guide, so straight edges come out wavy and
wobbly. Use it with noise as the guide for water ripples, heat shimmer, or a
hand-drawn look. Higher scale values produce more extreme distortion.
The first filter argument is the image to warp; the second (or the one piped
in with |>) is the guide image.
-- Wavy distortion effect:
Filter.fractalNoise
    { baseFrequency = 0.05
    , numOctaves = 1
    , seed = 1
    , stitchTiles = False
    }
    |> Filter.displacementMap { scale = 20 }
        Filter.sourceGraphic
This makes the shape's edges ripple as if seen through wavy glass.

Like displacementMap, but lets you pick which color channel of the guide
image drives the horizontal shift and which drives the vertical shift. By
default browsers use the alpha channel for both, which is rarely what you want
with colorful guide images like noise.
Selects which color channel of the guide image a displacement map reads from:
RedGreenBlueAlpha
Color manipulation
Recolors the input by computing each output color channel as a weighted
mix of the input channels. This is the general-purpose color tool: greyscale,
sepia, channel swaps, tints and transparency tricks are all particular
matrices. For the common cases, saturate, hueRotate and luminanceToAlpha
are easier to use.
The matrix transformation applied is:
| R' |     | a00 a01 a02 a03 a04 |   | R |
| G' |     | a10 a11 a12 a13 a14 |   | G |
| B' |  =  | a20 a21 a22 a23 a24 | * | B |
| A' |     | a30 a31 a32 a33 a34 |   | A |
| 1  |     |  0   0   0   0   1  |   | 1 |
on the RGBA color and alpha values of every pixel on the input graphics to produce a result with a new set of RGBA color and alpha values.
The calculations are performed on non-premultiplied color values.
The input here is the above matrix in row order [[ a00, a01, ...], [ a10, a11, ...], ...]. This is a 4x5 list of lists. Extra values will be ignored and missing values will be substituted for the identity matrix. So
Filter.colorMatrix
    [ [ 0.12 ]
    , [ 0, 0.12 ]
    , [ 1, 0, 0, 0, 0, 0.12 ]
    ]
is equivalent to:
Filter.colorMatrix
    [ [ 0.12, 0, 0, 0, 0 ]
    , [ 0, 0.12, 0, 0, 0 ]
    , [ 1, 0, 0, 0, 0 ]
    , [ 0, 0, 0, 1, 0 ]
    , [ 0, 0, 0, 0, 1 ]
]Adjusts how vivid the colors are. A value of 1 leaves colors unchanged,
0 drains all color away leaving grey, and values above 1 make colors more
intense. Use it to mute a background or make an element pop.
-- Desaturate to greyscale:
Filter.sourceGraphic
    |> Filter.saturate 0
The shape keeps its brightness but loses all color, appearing in shades of grey.

-- Vivid, over-saturated colors:
Filter.sourceGraphic
    |> Filter.saturate 2.5
Colors come out noticeably more intense than the original.
Shifts every color around the color wheel by the given angle in degrees, so for example reds can become greens and greens become blues. Brightness and transparency are unaffected. Useful for producing color variations of the same artwork.
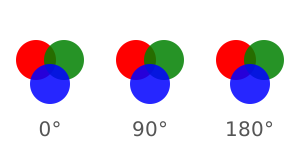
-- Shift all colors by 90 degrees:
Filter.sourceGraphic
    |> Filter.hueRotate 90
Every color in the shape changes to a different one, while the drawing itself stays put.
Turns brightness into transparency: bright areas of the input become opaque and dark areas become see-through, while all color is discarded. Useful for building masks from colored content, where you then use the result to hide or reveal parts of another image.

-- Use brightness as transparency:
Filter.sourceGraphic
    |> Filter.luminanceToAlpha
The result is a black image whose opacity follows the brightness of the original.
Adjusts each color channel independently by passing its values through a remapping function, much like the "curves" or "levels" tools in a photo editor. This is how you do brightness adjustment, contrast adjustment, color balance, or posterization (reducing colors to a few flat bands).

-- Increase contrast on all color channels:
Filter.sourceGraphic
    |> Filter.componentTransfer
        { r = Filter.table [ 0, 0.1, 0.9, 1 ]
        , g = Filter.table [ 0, 0.1, 0.9, 1 ]
        , b = Filter.table [ 0, 0.1, 0.9, 1 ]
        , a = Filter.identity
        }
Dark areas of the shape get darker and bright areas brighter.
Describes how one color channel's values are remapped in
componentTransfer. Build one with identity, table, discrete, linear
or gamma.
Leaves the channel unchanged.
For table, the function is defined by linear interpolation between the values given. The table has n+1 values (i.e., v0 to vn) specifying the start and end values for n evenly sized interpolation regions.
Let's look at an example:
Filter.table [ 0, 0.6, 0.8, 1 ]In this case we have 4 values, so we have 3 equal regions:
0.0 - 0.33 ==> 0.0 - 0.6


0.33 - 0.66 ==> 0.6 - 0.8


0.66 - 1.0 ==> 0.8 - 1.0
So for instance if I get a color value of 0.5, this falls in the middle of the second region, and so will get remapped to the middle of the output region, which is 0.7.
For discrete, the function is defined by the step function defined by the values given, which provides a list of n values (i.e., v0 to vn-1) in order to identify a step function consisting of n steps.
Let's look at an example:
Filter.discrete [ 0, 0.6, 0.8, 1 ]In this case we have 4 values, so we have 4 equal regions:
0.0 - 0.25 ==> 0.0


0.25 - 0.5 ==> 0.6


0.5 - 0.75 ==> 0.8


0.75 - 1.0 ==> 1
So for instance if I get a color value of 0.6, this falls in the third region, and so will get remapped to the third value, which is 0.8.
For linear, the function is defined by the following linear equation:
C' = slope * C + interceptWhere C is the input value and C' is the output value.
For gamma, the function is defined by the following exponential function:
C' = amplitude * C ^ exponent + offsetWhere C is the input value and C' is the output value.
Compositing and blending
Keeps only the parts of the first input that overlap the second, like
using the second image as a cookie cutter on the first. A common use is
recoloring a silhouette: cut a flood color down to the shape's outline.

Filter.compositeIn foreground maskOnly the parts of foreground that sit over mask remain visible.
Keeps only the parts of the first input that do not overlap the second, punching a hole in the first image wherever the second one is. Useful for cut-out and outline effects.
Draws the first input on top of the second, but only where the second is visible; anything hanging over the edge of the second image is trimmed away. Useful for painting decoration onto a shape without spilling outside it.
Stacks the first input over the second, like laying one photo on top of
another; the second shows through wherever the first is transparent. For
stacking more than two layers, merge is more convenient.
Keeps only the parts of each input that do not overlap the other; the overlap itself disappears. Where two shapes cross, this leaves a hole.
Combines two inputs pixel by pixel using the formula
result = k1*in1*in2 + k2*in1 + k3*in2 + k4, applied to each color channel.
This gives precise numeric control when none of the ready-made composite
operations do what you need, such as adding a lighting result onto a base
image.
-- Add lighting to a base image:
Filter.compositeArithmetic 0 1 1 0 base lighting
The brightness of the two images adds together, making lit areas glow.
Mixes the colors of two inputs where they overlap, using one of the
BlendModes. Unlike the composite operations, which decide which image wins
in the overlap, blending mixes the colors of both.
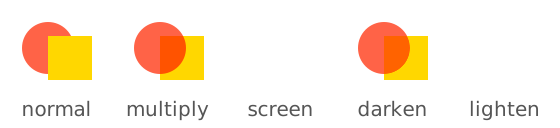
Filter.blend Filter.Multiply foreground backgroundWhere the images overlap the colors combine and darken, as if drawn with overlapping marker pens.
How the colors of two overlapping images mix, matching the blend modes found in photo editors:
Normal: the top image simply covers the bottom oneMultiply: colors combine to get darker, like overlapping stained glassScreen: colors combine to get lighter, like two projections on a screenDarken: keeps whichever pixel is darkerLighten: keeps whichever pixel is lighterOverlay: darkens dark areas and lightens light ones, boosting contrast
Stacks any number of filter results on top of each other, first in the list at the back, last at the front. This is typically the final step of a filter, for example placing the original shape back on top of its shadow.
Filter.merge [ background, middleLayer, foreground ]Positioning
Slides the input image by the given horizontal and vertical distance, leaving it otherwise unchanged. This is the usual way to push a shadow copy out from under the original shape.

Filter.sourceAlpha
    |> Filter.gaussianBlur 3
    |> Filter.offset 4 4
This produces a soft dark blob shifted down and to the right of where the shape sits.
Draws a dark, blurred copy of the input behind it, making the shape look like it floats above the page. This is the one-step version of the classic blur, offset and merge pipeline.
Filter.sourceGraphic
    |> Filter.dropShadow
        { offset = ( 3, 3 )
        , blur = 4
        , color = Color.black
        }
The shape appears with a soft black shadow peeking out below and to the right.

Morphology
Shaves the given radius off every edge of the image, so filled areas shrink and thin lines get thinner or disappear. Use it to make strokes or text look lighter, or to shrink a silhouette before building an inset effect.
Filter.sourceGraphic |> Filter.erode 0.5The shape appears slightly thinner all around.

Like erode, but with separate horizontal and vertical radii.
Filter.sourceGraphic |> Filter.erodeXY 1 0.5Grows every edge of the image outward by the given radius, so filled areas expand and thin lines get fatter. Useful for making text look bolder or for building an outline (dilate the silhouette, then subtract the original).
Filter.sourceGraphic |> Filter.dilate 1The shape appears slightly fatter all around.
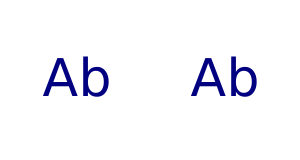
Like dilate, but with separate horizontal and vertical radii.
Filter.sourceGraphic |> Filter.dilateXY 2 1Tiling
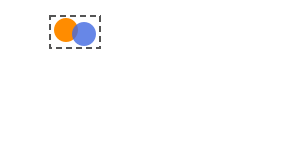
Fills the whole filter area by repeating the input image side by side,
like bathroom tiles. Usually combined with withinSubregion to pick out the
small patch that gets repeated.
Convolution
Recomputes each pixel as a weighted mix of itself and its neighbors, using the grid of weights (the kernel) you supply. Depending on the kernel this can sharpen, emboss, detect edges, or blur; use it when you need a pixel-level effect that none of the other filters provide.

The kernel dimensions are derived automatically from the list of lists.
-- 3x3 sharpen kernel:
Filter.sourceGraphic
    |> Filter.convolve []
        [ [ 0, -1, 0 ]
        , [ -1, 5, -1 ]
        , [ 0, -1, 0 ]
        ]


-- Edge detection with custom options:
Filter.sourceGraphic
    |> Filter.convolve
        [ Filter.edgeDuplicate, Filter.bias 0.5 ]
        [ [ -1, -1, -1 ]
        , [ -1, 8, -1 ]
        , [ -1, -1, -1 ]
        ]
The first example makes details crisper; the second turns the image dark with bright lines tracing the edges.
An option for configuring the convolve filter.
Sets the divisor for the convolution. By default, the divisor is the sum of all kernel values (normalizing the result). Override this when you want to control brightness.
Filter.convolve [ Filter.divisor 1 ] kernel inputAdds a constant value to the result after the kernel is applied. Defaults to 0. Useful for shifting negative results into visible range (e.g., for edge detection).
Filter.convolve [ Filter.bias 0.5 ] edgeKernel inputSets which pixel in the kernel aligns with the source pixel being computed.
Defaults to the center of the kernel (floor(orderX/2), floor(orderY/2)).
-- Aim the effect at the kernel's top-left:
Filter.convolve [ Filter.targetXY 0 0 ] kernel inputAt the edges of the image, duplicate the nearest border pixels outward. This avoids dark or transparent borders.
Filter.convolve [ Filter.edgeDuplicate ]
    kernel
inputAt the edges of the image, wrap around to the opposite side (tiling).
Filter.convolve [ Filter.edgeWrap ] kernel inputAt the edges of the image, use transparent black (zero) for out-of-bounds pixels. This is the default behavior.
Filter.convolve [ Filter.edgeNone ] kernel inputWhen set, only the alpha channel is convolved; the RGB channels are passed through unchanged. Useful for blurring transparency without affecting colors.
Filter.convolve [ Filter.preserveAlpha ]
    blurKernel
    input
Lighting
Renders shiny highlights, as if the input were a glossy 3D surface
reflecting a light. The input's transparency is treated as a height map, so
the shape appears embossed with bright glints where the light catches it. Use
it for glass, metal or plastic button effects, usually added onto the original
shape with compositeArithmetic or compositeIn.
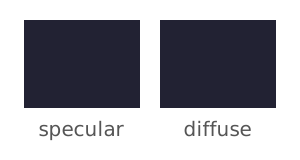
surfaceScale sets how tall the imaginary bumps are, specularConstant the
overall brightness of the reflection, and specularExponent how tightly
focused the glints are (higher means smaller, sharper highlights).
Filter.sourceGraphic
    |> Filter.specularLighting
        { surfaceScale = 5
        , specularConstant = 0.75
        , specularExponent = 20
        , lightingColor = Color.white
        }
        (Filter.pointLight
            { x = 50, y = 50, z = 200 }
        )
This shows a bright glint on the shape's edges nearest the light, fading to black elsewhere.
Renders soft, matte shading, as if the input were a rough 3D surface lit
by a lamp, with no shiny glints. Like specularLighting, it treats the
input's transparency as a height map; the result is an evenly lit embossed
look, good for paper, stone or fabric effects.
surfaceScale sets how tall the imaginary bumps are and diffuseConstant the
overall brightness.
Filter.sourceGraphic
    |> Filter.diffuseLighting
        { surfaceScale = 1
        , diffuseConstant = 1
        , lightingColor = Color.white
        }
        (Filter.distantLight
            { azimuth = 45, elevation = 55 }
        )
This shows the shape evenly lit from the upper left with a gently embossed look.
A light source for use with specularLighting and diffuseLighting.
Build one with pointLight, distantLight or spotLight.
A light source at a specific position in 3D space, shining in all directions like a bare light bulb hovering over the image. Areas near the light appear brighter than areas far away.
Filter.pointLight { x = 50, y = 50, z = 200 }A light source infinitely far away, like the sun, so its rays hit the
whole image from the same direction. azimuth is the compass direction the
light comes from and elevation is how high it sits above the horizon, both
in degrees.
Filter.distantLight { azimuth = 45, elevation = 60 }A cone-shaped spotlight, like a desk lamp: it sits at (x, y, z), aims at
the pointsAt position, and only lights what falls inside its cone.
limitingConeAngle (in degrees) controls how wide the cone is.
One step in a filter pipeline, producing an image that can be fed into the next step. Attach a finished pipeline to a shape with
Evg.filter.